 +7 (812) 4-673-673
Correction of the collection of electronic cards of TX-97 format along the route.
Procedure for performing professional proof-reading of the collection of electronic cards of the TX-97 format along the route
(With Chart Assistant settings).
The procedure is performed on the navigation computer / monoblock ECDIS, where the cartographic system and the connected computer are installed, where it is possible to send / receive email. letters.
1. Create a route in ECDIS, the maps of which will need to receive proof and save it.
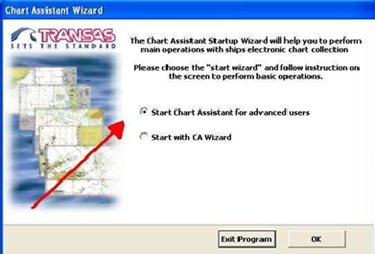
2. Start Chart Assistant.
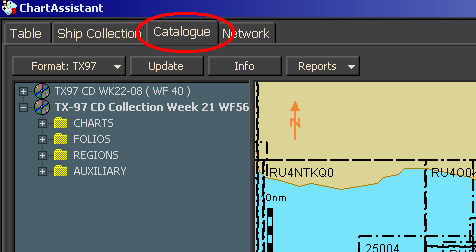
3. In the "Format" tab, select "TX97".
![]()
4. Select the "Catalog" tab.
5. Select the "Statistics / Selection" tab.
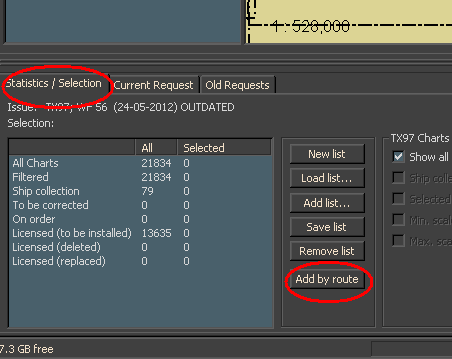
6. In the Selection section, click the "Add by route" button.
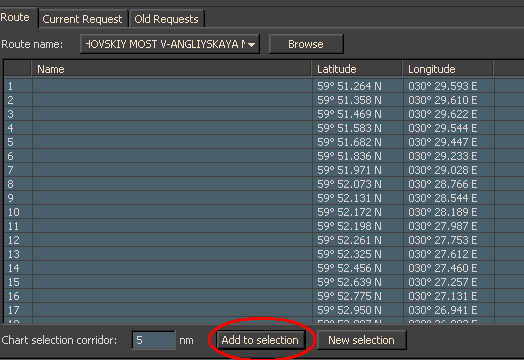
7. Select the previously created route from the drop-down list, or from the folder by clicking the Browse button (the route can be on external media, for example - on a USB flash drive).

8. Load the received route by pressing the left mouse button.
9. On the bottom panel, click the "Add to selection" button.
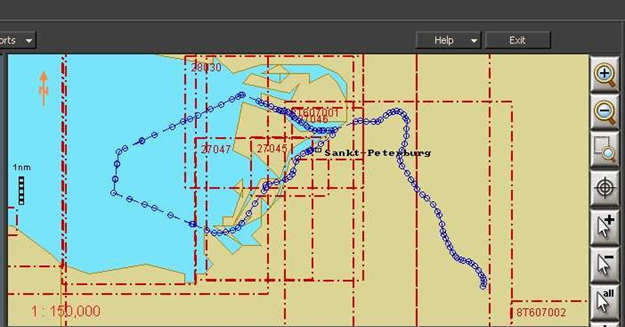
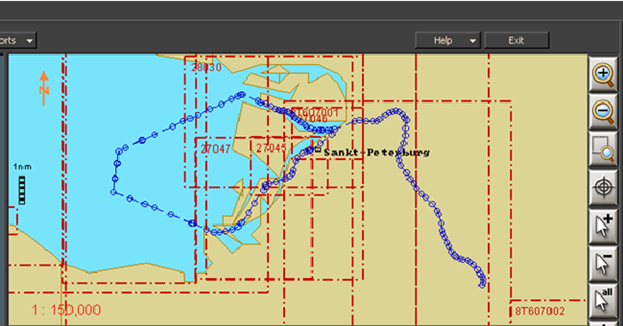
10. In the red color, the frames of the maps, along which the downloaded route passes, are allocated.
11. Press the "Save list" key.
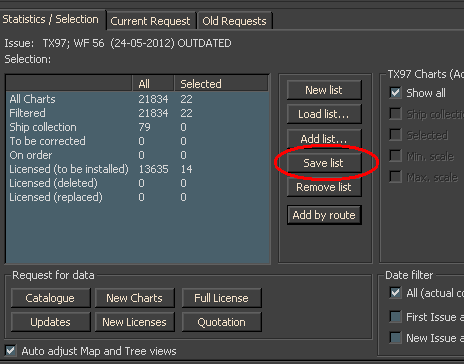
12. Enter the name of the file with the list of maps (it is recommended to give the file the same name as the name of the route).

13. Press the Save button.
A list of maps has been created, along which the route passes.
Next, we will perform the procedure of creating a proof-reading request for these cards.
14. On the connected computer, check the USB flash drive for viruses (it is advisable to have a separate USB flash drive intended only for this procedure), on this USB flash drive, create the CA_Inbox and CA_outbox folders.
![]()
15. Install the USB flash drive in ECDIS.
16. Start the Chart Assistant utility.

17. In the "Table" tab, make sure that the TX-97 card format is selected.

18. In the "Catalog" tab on the right side of the vertical panel, click the "Display configuration Dialog" button (crossed hammer and wrench):
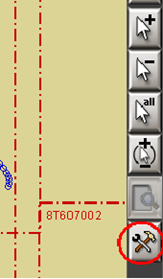
The Configuration window opens:
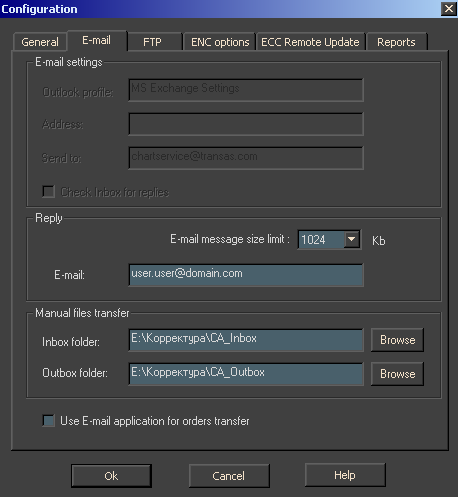
In the E-mail tab:
-Deep the daw in the "Use E-mail application for order transfer" box, if it is worth it.
-In the Reply section, in the E-mail field, enter the e-mail address from which the proof-reading request comes and on which the response will come with the correction file from the server-e. ship address.
Transas is the "E-mail message size limit". The default is 1024 Kb. (set your mailbox limit).
-In the "Manual files transfer" section, specify the path to the flash drive with the CA_inbox and CA_outbox folders.
19. After making the settings in the "Configuration" window, click the OK button.
20. On the "Catalog" tab, in the "Statistics / Selection" tab on the bottom panel, click the "Load list" button.
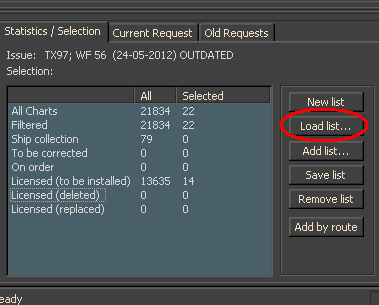
21. The Open window opens.
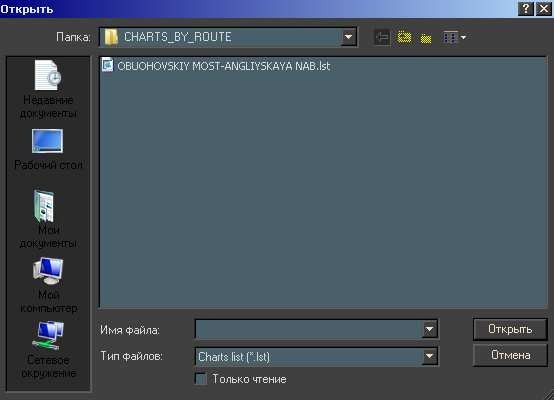
22. Select the file with the list of maps created earlier and load it by pressing the key
«Open». The frames of the selected cards will be highlighted in red.
23. In the Statistic / Selection tab, under "TX97 Chart (Active layer)", remove the check box in the "Show all" window and put a check in the "Ship Collection" window.
![]()
24. In the "Request for data" section, click the Updates button.
![]()
25. Select "Send Once" if one-time proofing is required on request) or "Send weekly", if the correction is supposed to be automatically received on a connected computer with a weekly frequency for the specified period (in the window).
26. Click the "Optimize Request" button. This will help reduce the cost and cost of traffic.
![]()
27. The "Request optimization" window opens. Click OK.
![]()
28. Click the "Send Request" button.
![]()
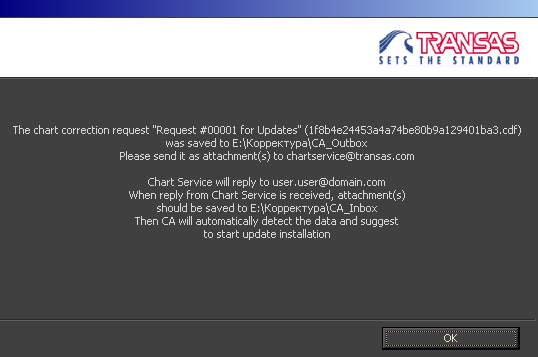
29. In the window that opens, click Finish.
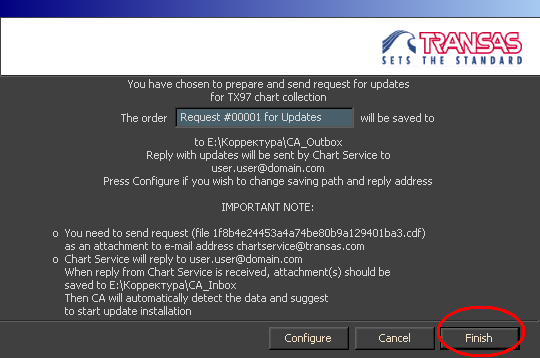
30. The file with the request for proof will be written to the flash drive in the folder CA_outbox.
31. Transfer the USB flash drive to the connected computer and send the request file to the e- address: Chartservice@transas.com
-------------------------------------------------- ---------------------------------------------
32. After receiving the answer (several files with the extension .CDF) with proofreading from the Transas server, you need to write them to the USB flash drive in the folder CA_inbox.
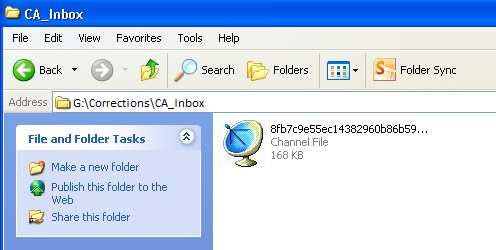
33. Transfer the USB flash drive from the received file to the folder CA_inbox in ECDIS.
34. Start Chart Assistant.
35. Chart Assistant will automatically detect this file in the CA_inbox folder.
36. A window will appear with information that the proof-reading file has been detected.
![]()
37. Click OK.
38. The "Actions available for Request # 0000 .. from ... ..for Updates" window appears, check the "Synchronize chart collection" box and click OK.
![]()
39. Update maps for the transition.
![]()
40. The "Chart Assistant last operation log" will open, with information on the corrected maps.
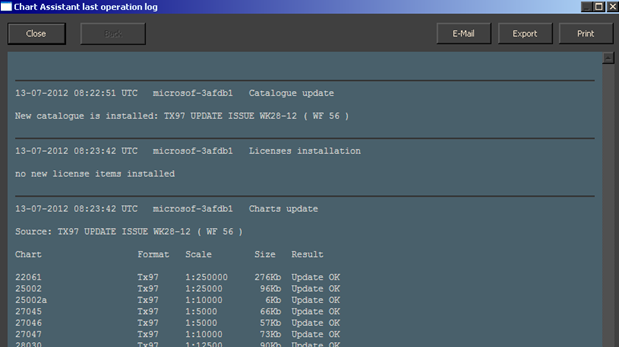
41. Procedure completed.
After completing the whole procedure, making sure that the proof is installed, it is recommended to delete all information from the CA_Inbox and CA_outbox folders on the USB flash drive to prepare it for the new request.